
To help you prepare for an efficient, professional video shoot, this article will take you through the steps of setting up your equipment.
So you’ve booked an interview and the time has come. You’re at the location, you’ve met your interviewee, you’ve brought all the necessary equipment with you - but how do you set it all up?
Step 1: Choosing Your Background
The background of your video is more important than you might think. While we don’t want to take away from the subjects in the foreground, the background still needs to be attractive and complementary to your interviewee.
Avoid shooting against a blank wall. It’s boring - plain and simple. You’ll lose your viewer’s attention quickly, unless you have a lot of B-roll to use.

A good background will be well-decorated, visually pleasing, and ideally should reflect the energy and atmosphere of your interviewee and/or their place of business.

Step 2: Setting Up Your Camera & Tripod / Shot Composition
Once you’ve picked a beautiful background for your video, it’s now time to set up your camera and tripod. It’s very important to monitor your shot composition to make sure it’s balanced and professional.
If you haven’t yet, turn the Grid Lines on in your camera/phone settings to have an extra assist in having the best possible shot.
Having a tripod will also make this step much easier, as you won’t have to worry about finding a steady surface for your camera. Check out our Tripod Recommendations if you need one.


For interviews done over Zoom, keep your camera or webcam at eye level and sit a few feet away. Watch your headroom. Place the subject in the middle of the frame as best you can. The ideal shot size for this is a Medium Close Up (head and shoulders.)

Remember to record with your phone in "landscape mode". That way the video is going to fill out the entire screen.
"Portrait mode" is only for Instagram reels and stories, TikTok and Facebook reels as well.
GOOD COMPOSITION
Rather than placing your subject in the very center, you can also use the grid lines as a guide to find a nice balanced spot for your shot.

Or, for some variance, bring the framing in closer with a classic head-and-shoulders shot.

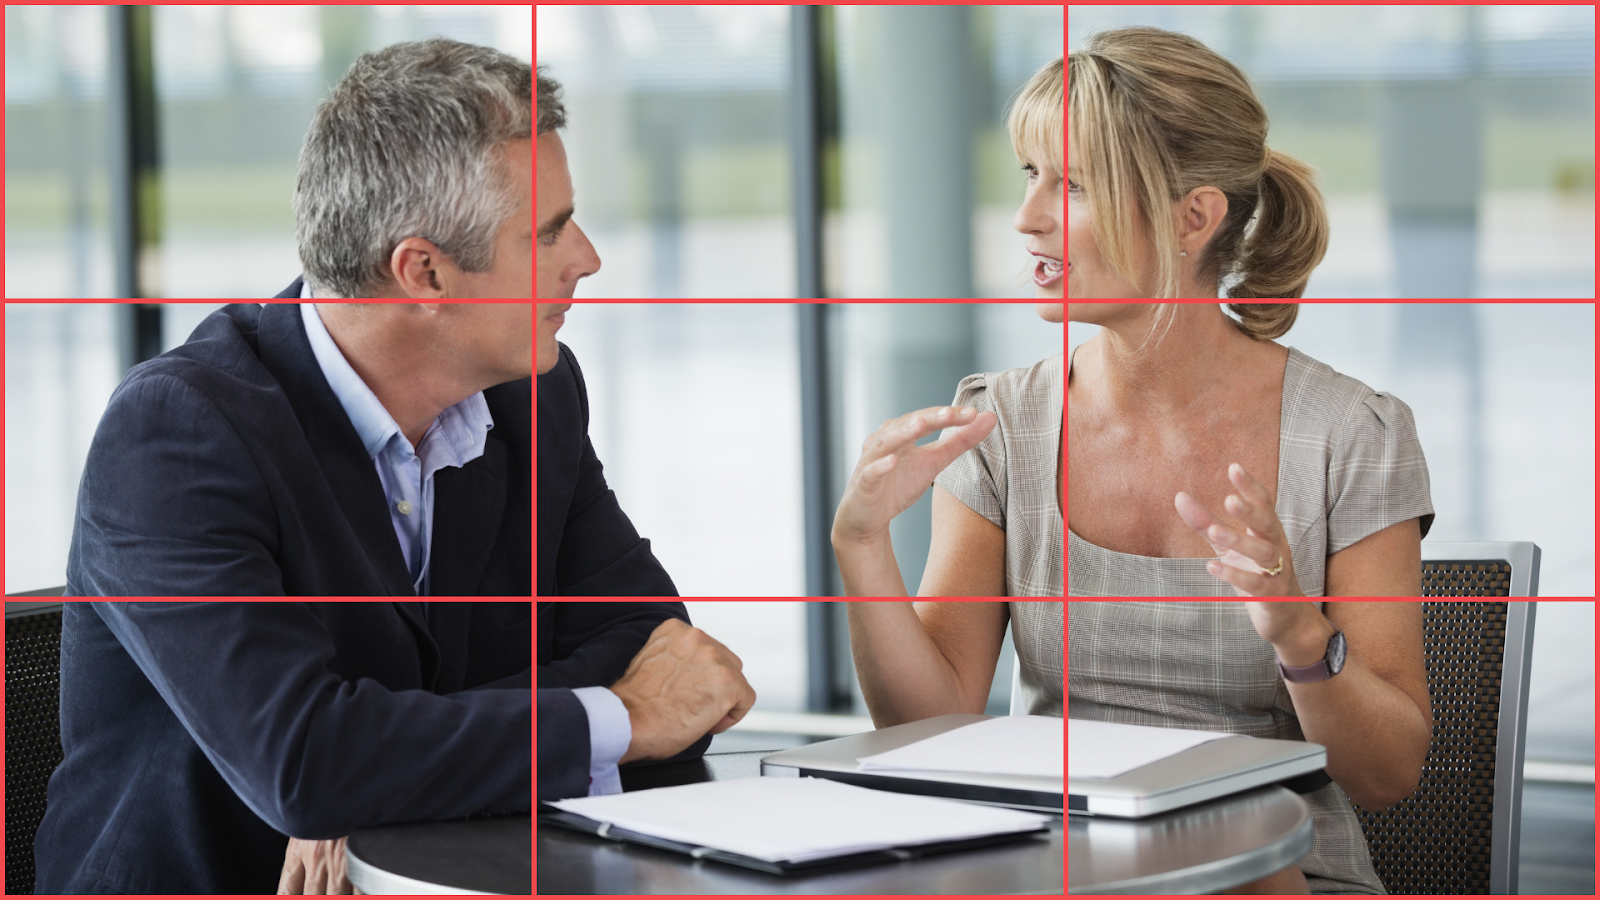
When you have two people on-screen, divide the frame and give each subject a half for an easy way to ensure balanced composition.
BAD COMPOSITION
Careful not to cut off the top of your subject’s head. Leave a couple inches of space between the top of their head and the frame.

You also don’t want to have too much headroom. An unbalanced shot with poor composition is uncomfortable for your viewers.

Having good composition is a great step towards having a very professional finished product.
Step 3: Setting Up Your Lights
After you have your shot lined up in a way you like, it’s time to make sure your lighting is also at its best. Poor lighting can ruin an otherwise perfect video, and can even impact the emotional tone for your viewers.
Relying on just natural light is a very risky move. You should have at least one ring light to help you control the lighting environment and mood. If you don’t have one, check out our article on Recommendations for Video Lighting.
GOOD LIGHTING
For natural light, use a bright window as your light source and stand facing the window with the camera in front of you. Remember to be mindful of your background.

With a ring light, keep it about 3 feet away from the subject on-camera and position it at a slight off-angle for a nice wash of light without blinding your subject. Keep the light at eye-level or slightly higher to avoid casting unflattering shadows.

BAD LIGHTING
Avoid shooting with your back against a light source such as a window. The lighting on your subjects will be far too dim to see any detail and the background will be overexposed - you’ll almost achieve a silhouette.

Keeping your camera and light at eye level will ensure nice, even lighting across your subject. Notice the shadows on his face - want a flat wash of light instead, with soft shadows where they naturally fall. Lighting from below is a great effect for Halloween! But not our interviews.

Step 4: Setting Up Your Microphones
The key to a great video is having great audio. Did you know that people are more likely to watch a video with poor visuals and great audio, than they are to watch one with great visuals and poor audio?
External microphones are necessary to achieve a crisp, professional sound for your video, and they help to diminish distracting background sounds. If you haven’t already bought yours or aren’t sure what mic to buy, use our Microphone Recommendations article as a guide.


If you are using a wired microphone, it’s a good idea to hide the wire. You can do this by either running it down the inside of the person’s shirt if that’s comfortable or along their shirt collar and down their back to be less intrusive.
Step 5: ACTION!
Now you’re ready to press the record button! It’s good practice to do a test recording of the video and audio captures to make sure everything looks and sounds how you want it to. You could even practice setting up your gear before the interview so you’re extra prepared and familiar with your gear.
It’s also important to be aware that when you’re shooting on-location, you’ll run into scenarios where you will have to adapt. Do your best, and be confident in your knowledge and skills!