
You must have signed up to Zoom and have the Zoom application installed on your device first.
NOTE: Interviewing using a device other than a PC or Mac Laptop may mean that there is restricted or limited functionality e.g. Chromebooks / Smartphones.
Visit Zoom’s website here to sign up for free: https://zoom.us/
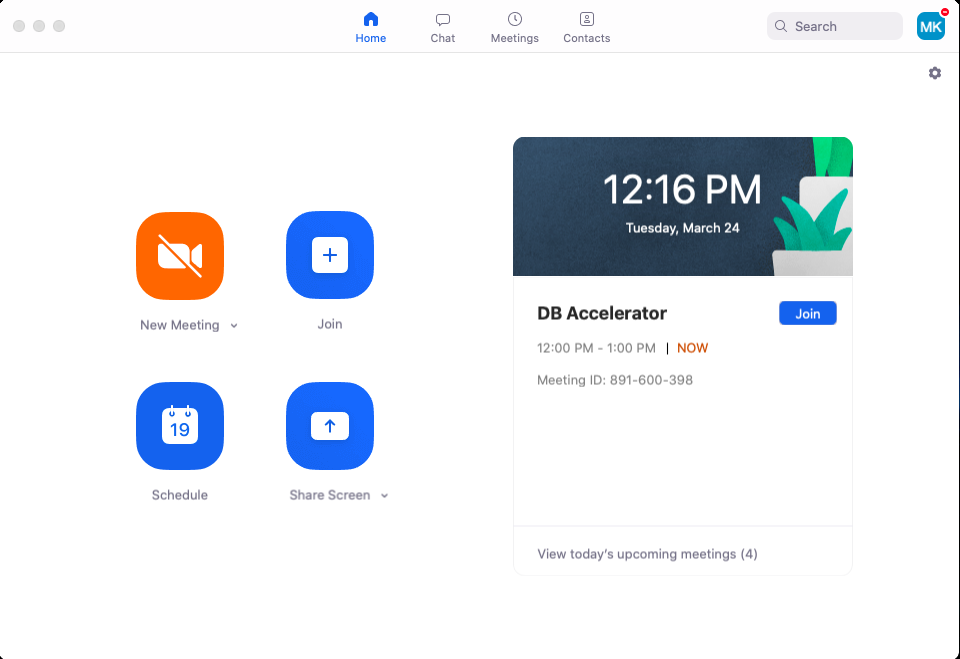
Step 1: Open a Zoom Meeting
To do this, open the Zoom application on your device, sign in and click on “New Meeting”. If you are scheduling several meetings, you can create private links by clicking on “Schedule”.
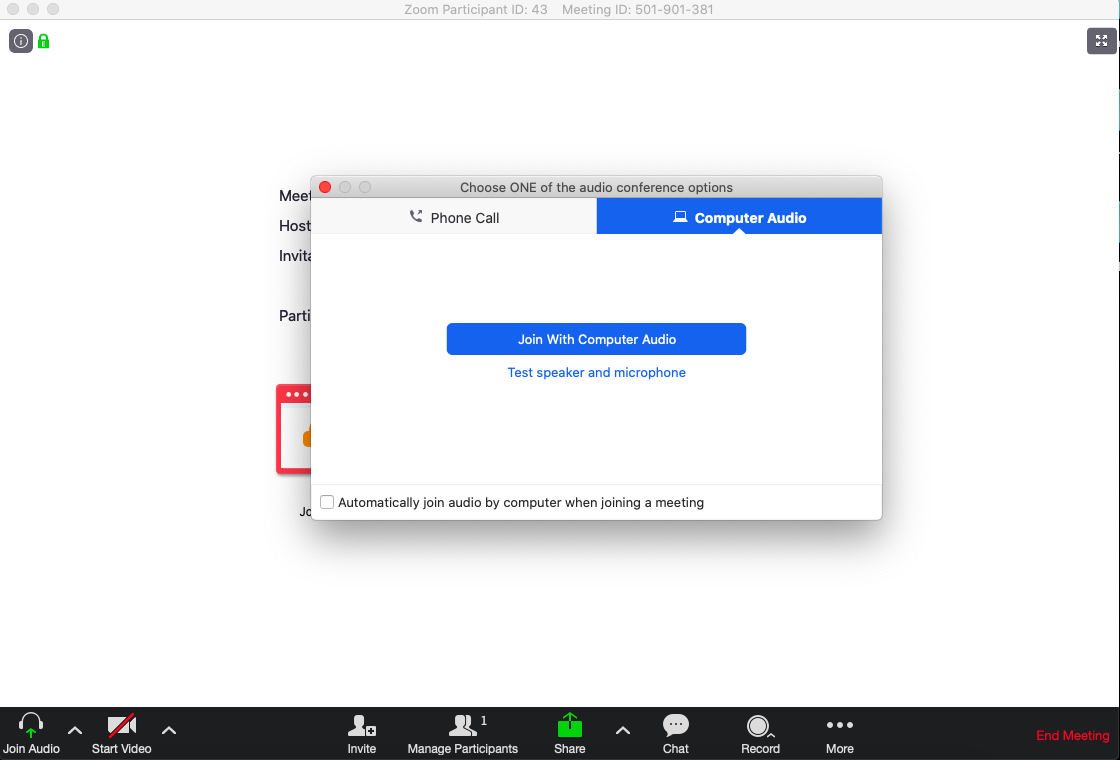
Step 2: Join audio
All attendees must connect their audio to the meeting. There are two options:
- Join with Phone (external device)
- Join with Computer Audio (using the microphone on your current device)
Unless you do not have a microphone on your current device, we suggest clicking “Join with Computer Audio”.
This will ensure that you are able to be heard and are able to hear your interviewee.
-
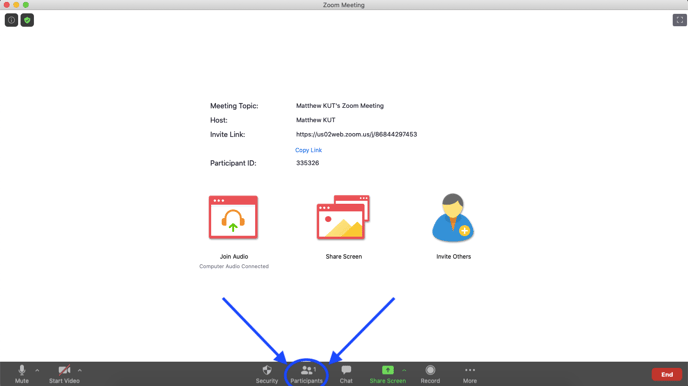
Step 3: Inviting your interviewee (in the meeting)
If you have not already scheduled and sent the private link to the client, you are able to do this within the now open meeting. Click on the Participants button as highlighted below.
This will open up the Participants list where you can invite your interviewee to the meeting. Click on the “Invite” button.
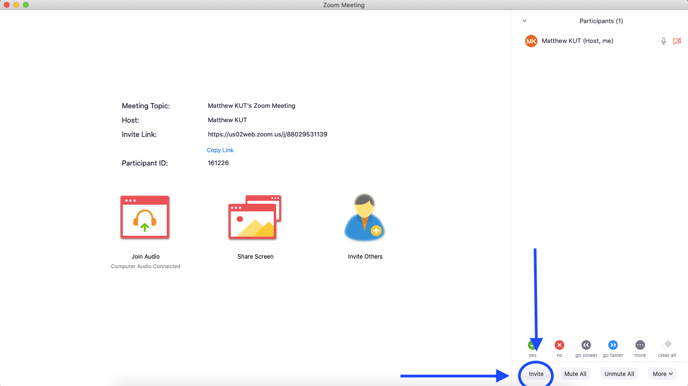
Once clicked on, you are able to invite contacts that are synced to Zoom, individually via email or copy the meeting link and send this to the interviewee via direct message.

After the interviewee has received the link, they simply need to click on it to open a prompt to download zoom (if necessary) and join the meeting.
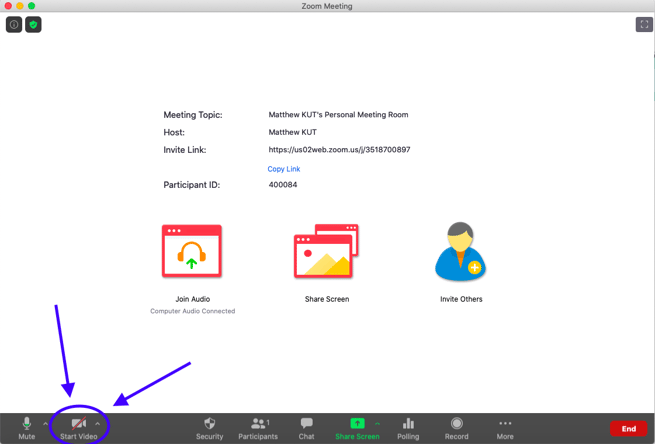
Step 4: Turning on your camera
Next, its time to turn on your webcam! To do this, click on the icon highlighted below. If your device does not have a camera, this function will not be available. Your interviewee will need to follow these instructions to turn their camera on once they have joined your meeting.
Step 5: Interviewee Joins Meeting
You will know that the interviewee has joined your meeting, as by default, Zoom will move your camera image to the top of the screen and the interviewee’s to the centre. You should also hear a chiming noise when they join on.
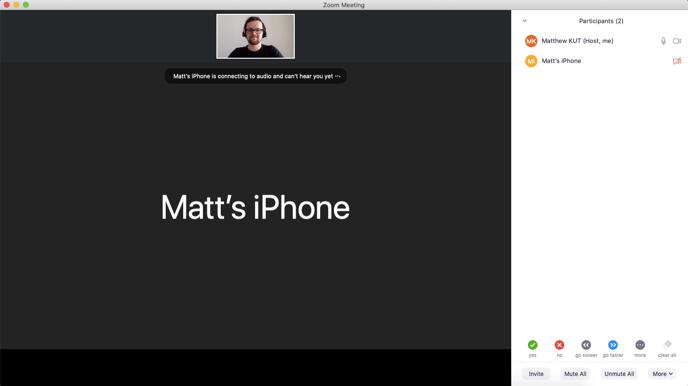
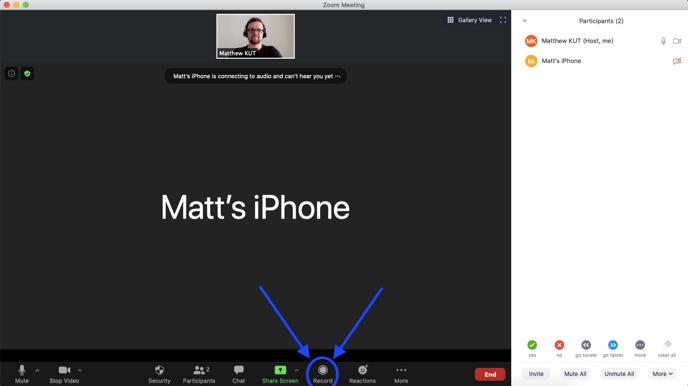
If they have not enabled their camera, their Zoom username will be present in the middle of the screen. This is often presented as the name of their device or their most recent username when they used Zoom in the past.
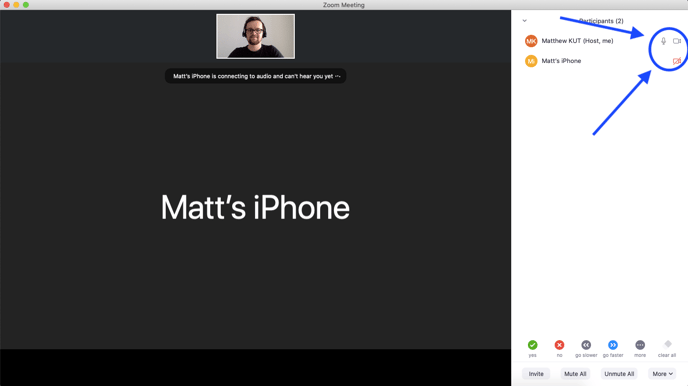
It is important that at this point, the interviewee follows the prompts, just like you, to join their audio. Otherwise, they will not be able to hear you or be heard during the meeting. If there is no microphone symbol next to their name on the “Participants List”, this means that they have not connected their audio.
After joining, the interviewee can also turn on their camera through the same steps as listed earlier. If they do not have a webcam, this will not be an option for them.
Step 6: Enable Gallery Mode
By default, Zoom will focus the camera on who is talking and have their webcam/image populate the screen.
This can be changed to an evenly split view, with both images/cameras present, called Gallery View.
To do this, click on “Gallery View” in the top right corner of the screen.
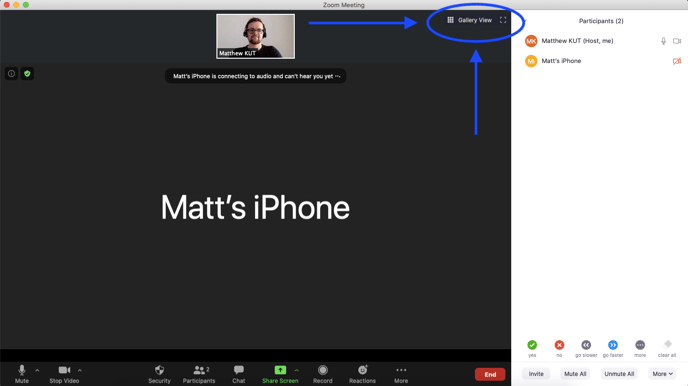
This will create a side by side view of the attendees that have joined.

Step 7: Record the conversation
The final and vital step before you begin your interview is to start recording. To do this, simply click on the “Record” icon towards the bottom right corner of your screen.
This will give you the option to record the interview on your computer OR for premium subscriptions, record to the cloud.
After the interview has been recorded. You can find the recording in one of two places, depending on whether you have a free or paid subscription with Zoom. Premium subscription holders are able to save either to the cloud storage on Zoom or to their device. Free subscription holders are only able to save to their device.
For full instructions on how to find the recording, click here.
Useful tips:
- Create a private link per meeting, this prevents others from joining at the same time. If you are using the same meeting each time, we recommend locking the meeting after they have joined. This prevents any future attendees from joining during the duration of your interview.
- Use this website to troubleshoot IT questions with Zoom
- Give yourself time to set up before starting the interview
- Know that the free version of Zoom is limited to 40 minutes per meeting.
- Do a sound check for both yourself and the interviewee before starting. For full instructions, check out this link.
To get a full picture of what you are going to create - check out this video below: