
Step by step guide on how to add your Event to the site.
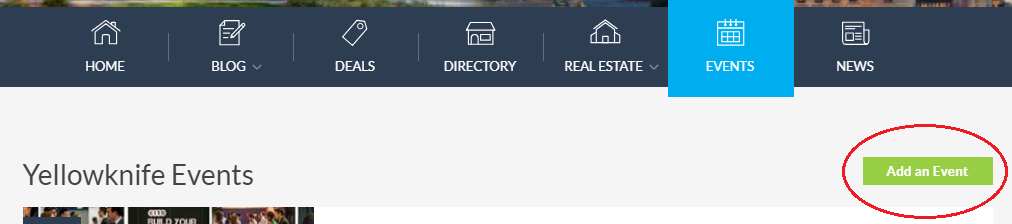
- Click on “Events” in the navigation bar at the top.

2. Click on "Add an Event"
3. Here you will see empty fields where you can enter the details of the event:
- Title - Name of your Event.
- Location Address - Address where your Event will take place
- Type - This is where you can select whether this is a Paid or Free Event. If you are not sure of the cost or do not want to enter a cost, you can leave it set to “Free”. (Free events do not say that they are free)
- Start Date & Time - When the Event will start
- End Date & Time - When the Event will end
- URL - If there is an official site or web page for the Event, you can copy and paste the URL to it here. This field is optional.
- Venue - This is where you can enter the name of the venue. This field is optional
- Contact Info - If you have contact information (ex, phone number, email, etc) for the Event, you can enter it here. This field is optional.
- Event Annotation - Enter a brief one or two sentences to describe the Event. This verbiage will appear in the preview for the Event
- Preview Image - You can upload an Image for the Event here.
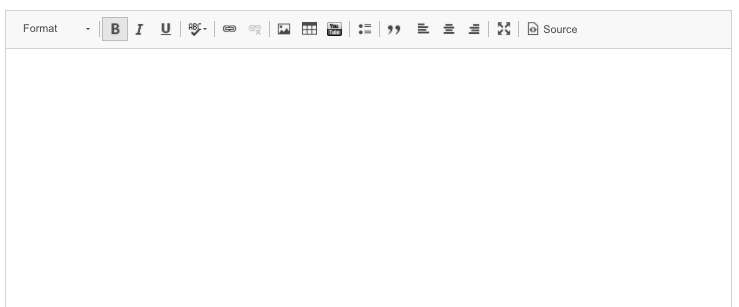
4. Include full details to event in the larger text field with the toolbar.
5. When complete, click on “Add an Event”, located at the bottom.

Additional Notes:
- To create a recurring event, check the box labelled "Recurring", found underneath the "End Date & Time".
- Checking this box will present you with options for the days of the week that you would like the event to reoccur on.
- Setting the Event to reoccur "Every 1 days" will allow the Event to reoccur daily.